Impressive Crafts You Can Do At Home!
June 11, 2023
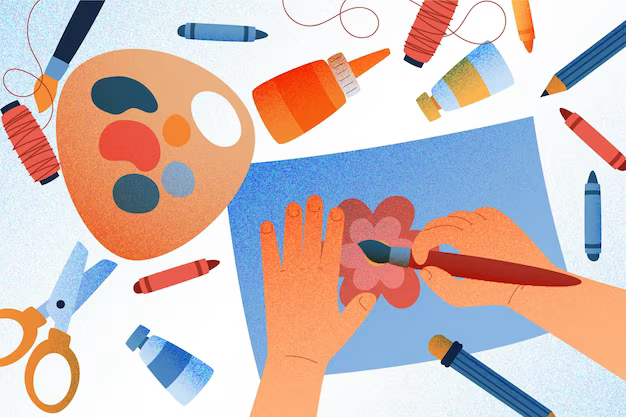
Have you ever wanted to make something cool, but the materials were too expensive or hard to find? Have you ever wanted to craft, but didn’t know where to start? Have you ever just felt bored and wanted to make something? Well then you’re in luck! Read on to find impressive crafts that you can do at home!
First on our list are dream catchers! Did you know that dream catchers were made by Native Americans to catch bad dreams while letting good dreams through?
Materials Needed 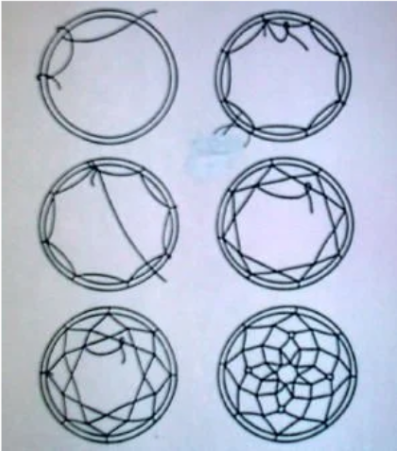
- 1 metal embroidery hoop
- suede/leather cord
- All purpose sewing thread/jewelry wire
- thread/twine
- Feathers
- Beads
Where you can find materials
You can find these materials at:
- Walmart / Walmart.com
- JOANN / Joann.com
- Michaels
Directions
- Tie a tight knot with the suede/leather cord on the hoop. Then begin to wrap the cord around the hoop and tighten with your fingers. Continue until the entire hoop is covered. Then tie a knot to your original end and trim the edges.
- Tie a knot on your hoop with the thread or twine. Bring your thread/twine a few inches across the hoop and wrap around the ring and pull through the opening. Make sure it’s tight. Repeat all the way around until back at your starting point. Use the picture above if you need help.
- Do the same thing of pulling your thread/twine over, under and through, in the center of each section. Again, make sure it’s tight.
- Continue this process until the openings become very small, and tie a knot. Trim off the excess thread/twine.
- Next, either layer the feathers or use them individually. Use all purpose sewing thread/jewelry wire to wrap tightly along the feather stem, and secure with a double knot. Add bead(s) to the feather stem to hide the thread/jewelry wire, (or just to decorate!) Repeat as many times as wished.
- Tie sewing thread/jewelry wire to bottom of the dreamcatcher.
Next on the list are paper mache teacups! These look very pretty, but take a long time.
Materials Needed 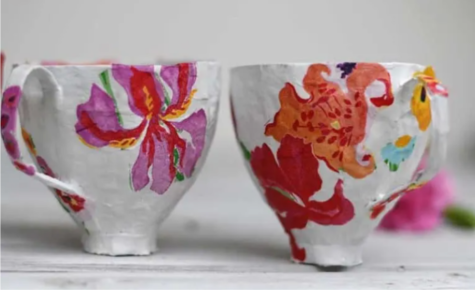
- 1.25 or 1.5 liter coke bottle. (original shape)
- Old newspaper
- Vaseline
- Mod podge
- White acrylic paint
- Floral paper napkins
Where you can find materials
- Walmart (for coke, buy and reuse bottle when empty)
- Walgreens
- Rite Aid
- Target
- Michaels
- Party City
Directions
- Use scissors to cut off the top of the coke bottle 9-10 cm from the neck of the bottle. Rub the inside of the bottle top with vaseline.
- Cut the newspaper into strips 1 cm by 4 cm. Add water to the Mod Podge by 50/50.
- Wet newspaper strips for the first layer, and line them on the inside of the coke bottle top. For the next layers brush the Mod Podge and water mixture onto the strips and apply onto the other layers. Add two layers of paper at a time, let it dry overnight, and add two more layers. Make as thick as you want. Leave to dry thoroughly.
- Carefully remove the newspaper from the coke bottle. Use scissors to trim the paper mache to make it look more like a teacup shape. Glue newspaper strips to the top edge to make it smoother.
- Cut out a circle of paper 4 cm in diameter. Then draw a circle in the middle 2 cm in diameter. Cut slits from the outer circle to the inner circle 5mm apart. Glue the paper circle to the inside of the paper mache.
- For the handle, cut a strip of newspaper 9 cm by 4 cm. Cover with Mod Podge and glue mixture and fold into a 5 mm wide strip. While the paper is still wet, shape it in an s-shaped handle and attach to the teacup. Clip or pin it if needed to hold it in place while it dries. Make another strip of rolled paper, fold it into a circle, and glue to the bottom.
- Add a layer of the Mod Podge and Water mixture to the whole cup to cover the grease from the vaseline. Let it dry.
- Paint the teacups with the white paint inside and out and let dry. Make sure no newspaper is visible.
- Separate the layers of the napkin so you only have the top printed layer. Then cut out the flowers from the design one at a time. Brush the Mod Podge and water mixture on the cup where you want flowers, and gently apply flowers to the cup. Add the flowers inside and outside the cup. You may also paint flowers instead. Finally, coat the cup with another layer of Mod Podge and water mixture and let dry.
The final activity on the list is starburst wreaths! These take very little time, and are great decorations for your wall!
Materials Needed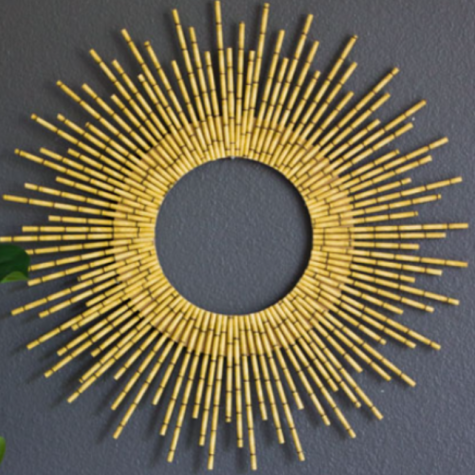
- Paper straws that look like bamboo (around 60 straws needed)
- 12 inch wood craft ring
- Hot glue
- Scissors
- Ruler
Where you can find materials
Orientaltrading.com
Amazon.com
Walmart / walmart.com
Directions
- Add one straw to each quadrant of the wood ring with hot glue. Add another straw in the center of each quadrant, making sure they are equally spaced.
- Continue adding straws spaced evenly until you have covered the ring with 32 straws.
- Cut smaller straws 6.5” and 5” if you would like different lengths. Add one 6.5” and one 5”, (or if you only used one of those lengths, two of the same,) in the spaces. Continue until the entire wreath is filled.
These three crafts are fun to make, and look pretty cool once they are completed! You can work on these crafts over the summer, on the weekends, and even after school if you have the time! Hopefully, you will have fun doing them!
Works Cited
Armstrong, Claire. “Cool Adult Paper Mache Crafts for Home Decor.” Pillar Box Blue, 26 June 2021, https://www.pillarboxblue.com/adult-paper-mache-crafts/. Accessed 16 May 2023.
“DIY | How To Make A Dreamcatcher.” YouTube, 12 May 2017, https://www.youtube.com/watch?v=j4qh8BkT3JE. Accessed 16 May 2023.
“Dreamcatcher Legend.” St. Joseph’s Indian School, https://www.stjo.org/native-american-culture/lakota-legends/dreamcatcher-legend/. Accessed 16 May 2023.
“How to Make a Starburst Wreath from Paper Straws.” Design Improvised, 11 September 2018, https://designimprovised.com/2018/09/how-to-make-starburst-wreath-from-paper-straws.html. Accessed 16 May 2023.
“Mini Dreamcatcher : 4 Steps (with Pictures).” Instructables, https://www.instructables.com/Mini-Dreamcatcher/. Accessed 16 May 2023.